How To Make A Pillow Cover – Pillows are an integral part of any bedroom. They are a perfect resting place for your head and provide vital pops of color. Pillows also make appearances in living rooms, dens, patios and any parts of the house that could use a little comfort and decor. However, pillows require special care as they gather the dirt and grease over time. To prolong the life of your pillows, learn how to make pillow covers.
There are different types of pillow covers that vary in difficulty to create. For instance, making a pillow cover with a zipper is a bit more complicated than an envelope pillow cover. Making throw pillow covers may not require knowing how to install a zipper, but you still need to measure and cut straight. For any of these sewing projects, a good eye and steady hand are necessary.
How To Make A Pillow Cover
Envelope Pillow Cover
Slip Stitch Pillow Cover
How To Make A Pillow Cover With Zipper
How To Make Throw Pillow Covers

Supplies Needed For Your Slip Stitch Pillow Cover
For those that know a simple slip stitch, here is a tutorial that explains how to make a simple pillow cover.[1] You will need your usual sewing supplies, fabric, and a pillow insert.
How To Make A Pillow Cover Materials:
- Ruler
- Fabric Pen
- Thread and needle or sewing machine
- Scissors
- Pins
- Pillow insert
- Fabric
- Iron
How To Make A Pillow Cover Instructions:
Step 1
To measure and cut the fabric, add an inch to the height as well as the length of the pillow insert to create a seam allowance.
Step 2
Using a ruler and fabric pen, draw two squares on the fabric using these dimensions.
Step 3
Cut out the square shapes.
Step 4
Pin the squares together with the unfinished sides facing outward.
Step 5
On the bottom edge, make a mark 3 inches in from the right and left sides.
Step 6
Starting at one of the marks, start sewing along all the edges of the pillow. Allow a ½ seam allowance and leave the space between the marks open.
Step 7
Snip off the corners before turning the pillow cover right side out.
Step 8
Push the corners outwards using a closed pair of scissors or a point turner.
Step 9
Press on the edges of the pillow with an iron to create a clean edge. The unfinished edges will be under a half an inch.
Step 10
Insert your pillow form, then slip stitch the cover close. [1]
How To Make A Pillow Cover
Envelope Pillow Cover
Slip Stitch Pillow Cover
How To Make A Pillow Cover With Zipper
How To Make Throw Pillow Covers
How To Make A Pillow Cover – Envelope Pillow Cover
Image Credit: creeklinehouse.com
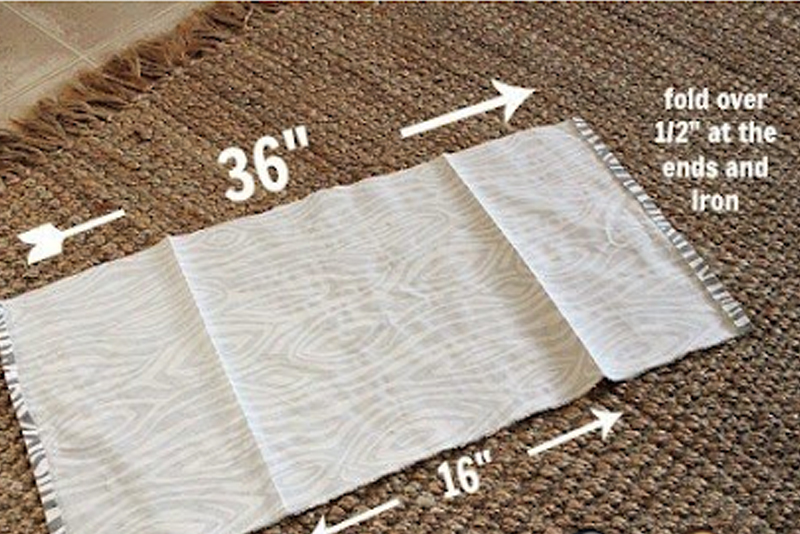
An envelope pillow cover is one long rectangle of textile that is overlapped in the back to create a closure. Making one is a simple process.
Here are the instructions for a 16” pillow.
How To Make A Pillow Cover Materials:
- Sewing machine
- Thread
- Scissors
- Piece of fabric
- Pillow insert
- Iron
- Ruler
How To Make A Pillow Cover Instructions:
Step 1
Using the material of your choice, cut a piece of fabric that is 36” in length and 17” wide.
Step 2
Fold the sides in, then iron two creases that allow for a total of 16” in the middle column.
Step 3
Iron two ½” creases on each of the shorter ends to create the end seams.
Step 4
Fold in the sides with the fabric side of choice facing inward.
Step 5
Sew two side seams measuring ½” on both lengths.
Step 6
Insert your pillow! [2]
How To Make A Pillow Cover
Envelope Pillow Cover
Slip Stitch Pillow Cover
How To Make A Pillow Cover With Zipper
How To Make Throw Pillow Covers

How To Make A Pillow Cover With Zipper
Adding zippers to any craft project can be daunting, but with the right instructions, it is not that difficult to make a pillow cover with a zipper.[4] However, you must know how to use a zipper foot and machine.
How To Make A Pillow Cover Materials:
- Fabric (2 pieces per pillow cut to the same dimension as your pillow insert)
- Pillow Insert
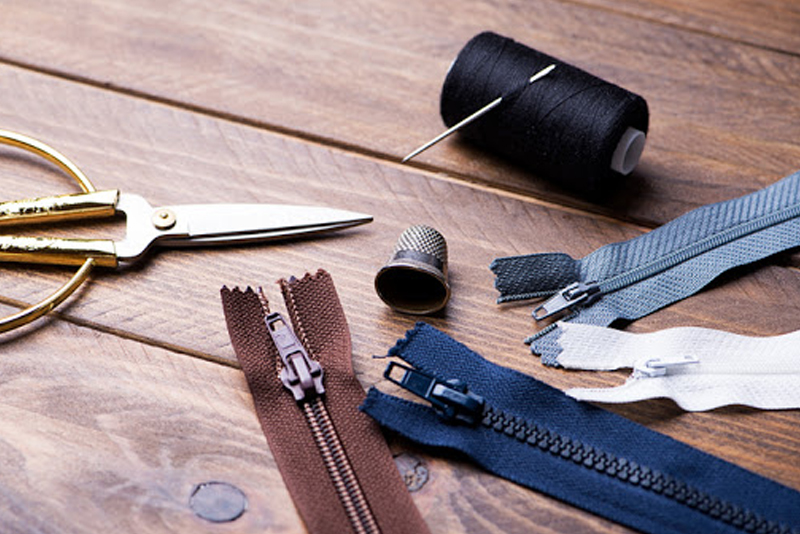
- Zipper (3-4 inches shorter than the bottom edge of your pillow)
- Sewing machine
- Zipper foot
- Pins
- Coordinating thread
- Scissors
- Iron
How To Make A Pillow Cover Instructions
Step 1
Cut two pieces of fabric, one for the front and one for the back of the pillow.
Step 2
Lay out the fabric, one piece on top of the other, with the unfinished sides facing out.
Step 3
Decide which edge will be your bottom edge, paying close attention that the pattern lines up on both pieces.
Step 4
Lay your zipper along the bottom of the pillow cover.
Step 5
Mark where the zipper starts and stops by placing pins in the fabric. (Do not pin your zipper in place.)
Step 6
With ½” seam allowance, sew a regular straight stitch from the edge to each pin. Use backstitching to start and stop your stitch. Do this on both sides.
Step 7
Between the pins, use the widest stitch possible. On many machines, the zig-zag stitch works well. (This will be removed once the zipper is in place.)
Step 8
Iron the seam you just made, and place your zipper on the seam, face down.
Step 9
Pin the zipper in place.
Step 10
Attach the zipper foot on your machine.
Step 11
Using a regular straight stitch, start sewing at the end of the zipper farthest away from the zipper handle. Keep the stitch as close to the zipper teeth as possible.
Step 12
Stop a little bit from the zipper pull. While keeping your needle in the fabric, lift the zipper foot and carefully unzip the zipper past the foot. Then, lower the foot and continue to the end of the zipper. Backstitch to end your stitch.
Step 13
Move the zipper pull back to the end, switch the zipper foot to the other side and repeat the above steps. [3]
How To Make A Pillow Cover
Envelope Pillow Cover
Slip Stitch Pillow Cover
How To Make A Pillow Cover With Zipper
How To Make Throw Pillow Covers

How To Make Throw Pillow Covers
Throw pillows are typically found in living rooms to bring a room together or add a pop of color or texture.
It is easy to change the atmosphere of the room by changing the pillowcases on your throw pillows. The best part about it is that there is no need to spend a lot of money on the project. [5]
Here are the materials that you will need for a machine sewn pillow.
How To Make A Pillow Cover Materials:
- Pillow insert
- Fabric
- Sewing Kit
- Sewing Machine
- Fabric Scissors
- Seam Ripper
- Thread
- Pins
- Snips
Follow these steps to machine sew your own throw pillow cover like a pro:
Step 1
Iron your fabric. Measure the dimensions of your pillow insert, then add 5/8” on all the sides to create an allowance.
Step 2
Cut your pillow fabric squares in a straight line using a rotary cutter or fabric scissors.
Step 3
Pin the pillow fabric squares with the unfinished sides facing outward.
Step 4
Sew the fabrics together with 5/8” seam allowance. Leave the bottom side open.
Step 5
Use an iron to press the seam open to create a crisp finish.
Step 6
Cut the corners with your scissors on the inside of the cover so that this piece of fabric will not get in the way. Do this for all sides as needed.
Step 7
Turn the cover inside out, then poke out the edges using your fingers or closed scissors.
Step 8
Place the pillow insert inside the pillow cover, then slip stitch to seal the pillow cover. If you want to be able to remove the pillow insert, use an iron-on adhesive so you can easily open the cover as needed.
Step 9
As you familiarize yourself with your sewing skills, practice with the piping and cording to create more decorative designs for your pillow covers for your DIY pillow.
You may also enjoy How To Clean Pillows In 5 Easy Steps
How To Make A Pillow Cover
Envelope Pillow Cover
Slip Stitch Pillow Cover
How To Make A Pillow Cover With Zipper
How To Make Throw Pillow Covers
How To Make A Pillow Cover Resources:
[1] Martha Stewart; Three Ways to Make a Pillow Cover, July 2010.
[2] The Creekline House; The 10 Minute DIY Pillow Cover, Courtenay, September 08, 2018.
[3] Hey There Home; How To Make A Zippered Pillow Cover (A Tutorial For The Total Beginner).
[4] DIY Projects; How to Sew a Pillow | Make DIY Throw Pillow Covers, 2014.


